As an Amazon Associate I earn from qualifying purchases.
DIY a timber door from scratch can be challenging but rewarding. Knowing you’ve made something with your own two hands (and a few tools) can be a wonderful notion. Of course, entry doors aren’t easy to build; the best timber has to be used but with a little know-how, anything is possible. Fortunately, building a DIY wooden front door can be fairly straightforward; see how can you build a new front door for your home?
Plan the Design
You want to build a front door but no matter what sort of exterior or entry door it is, it has to be secure. It has to be made strong, sturdy, and properly, and it all starts with the design. Would you prefer plain wooden doors with extensive mould work or a simple entry door with glass paneling? Ideally, you need a clear-cut design so you can follow with ease. Remember, it’s difficult to tweak the design once you’ve done extensive work on the doors, not to mention, costly. Instead, do some rough drawings or look online for inspiration.
Prepping and Milling the Timber
You can easily build your own front timber door with a router; however, you have to decide the type of entry door you want and the thickness of the wood. If you’ve already planned your designs, you’ll have a picture of what the doors should look like in your head, but you need to decide if you want to use 1-3/8” or 1-3/4” wooden panels. The later is more commonly found in modern homes but this is a personal choice. It may depend on what you find easier to work with.
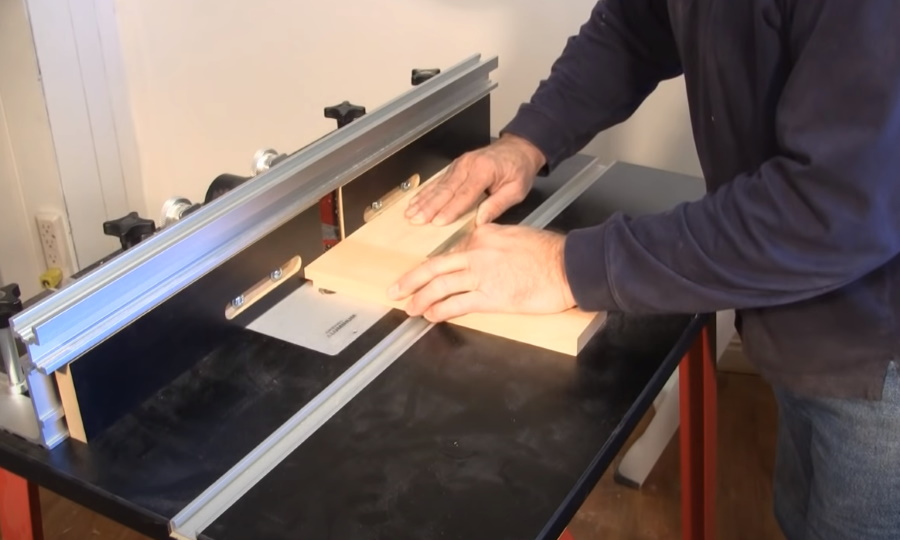
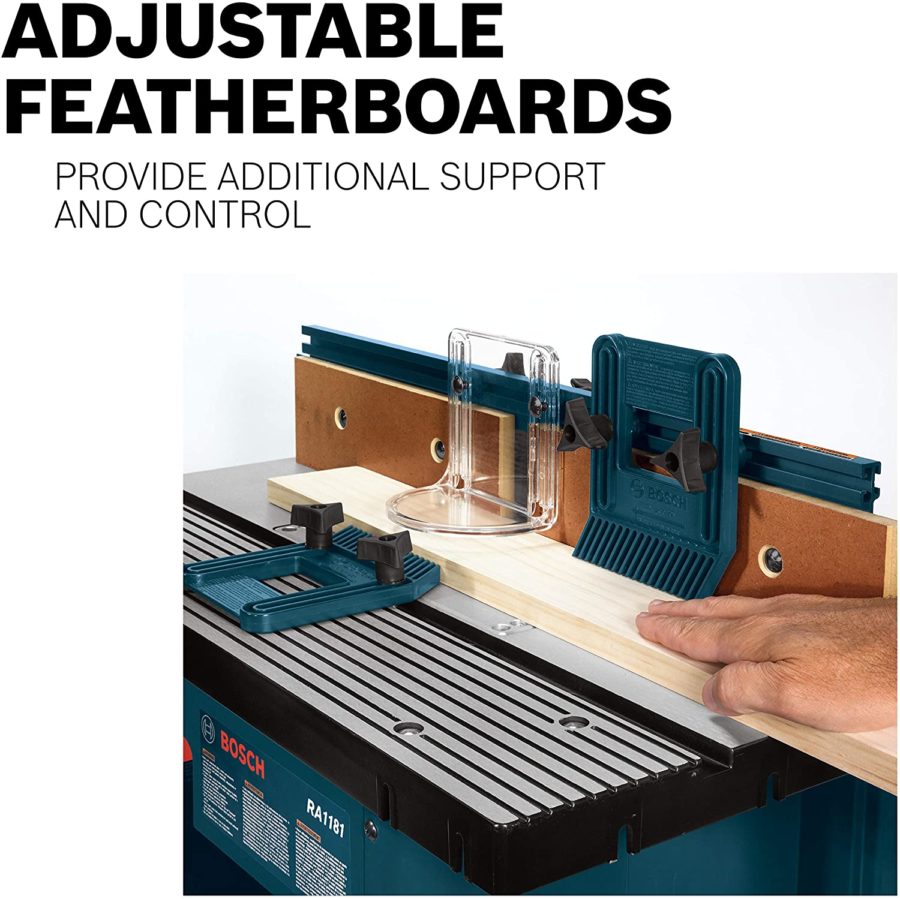
You’ll need a router table and may require a passage door with rail and stile router set too. This is the cutting tool or drill bit that is attached to the router and does the necessary cutting. There are different router bits to choose from but the standard or raised panel bit could be easier to work with. Also, additional bits may be required, depending on how you want to mould the doors and panels. For larger cutting, a table saw attachment could be used.
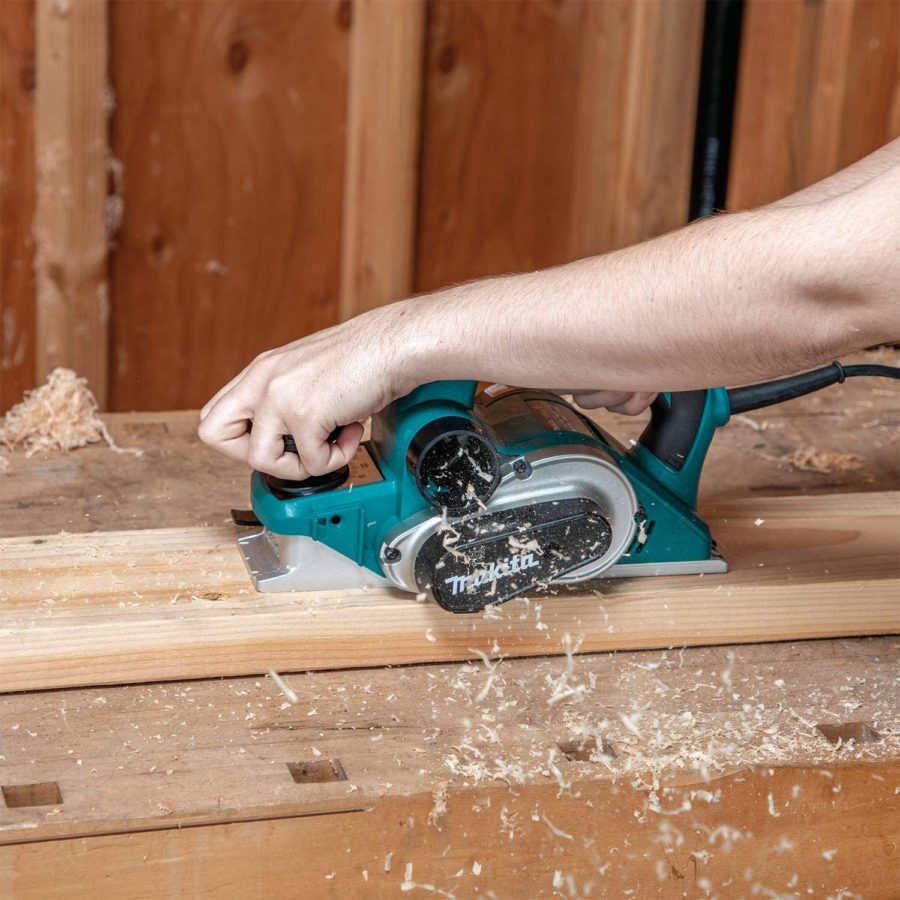
If you haven’t already done so, measure each wooden panel to the appropriate size. Each piece needs to be cut to size, but ideally, cut them slightly larger than needed, just in case your exterior door measurements are slightly off. Also, they can be trimmed later if they warp. To get a smooth finish to the front and back of the doors, you’ll need to mill them with a wooden plane or sander.
Joining Together
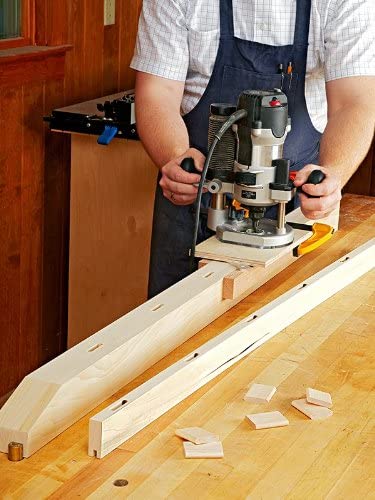
Doors must be joined together to create a secure entry point. Each wooden piece is made separately and when they’re finished, they must be routed to create stile and rail cuts. These are the cuts that essentially join the pieces together. The router table will make it easier to create these edges. Please see https://www.rockler.com/router-table-basics-quick-tour-router-table-techniques for more details.
Tenons must be created so the rail and stiles can join together. This means they need to be mortised. It’s easy to do and you’ll need to carefully measure the two parts up correctly as each wooden piece interlocks with one another, creating the finished door. Measure how deep each cut needs to be and the interlocking part so they connect perfectly. Ideally, you want a snug fit rather than a loose one because if adjustments need to be made, you can’t add back to the wood. Again, precise measurements are required and a chisel can be used to offer a more clean-cut finish.
Next, you need to dry assemble all of the pieces – but don’t add glue yet – this is about making sure the doors have been properly cut and moulded. If there are issues, it’ll be difficult to tweak and you may need to start over again. Instead, if you dry assemble you can spot any potential errors or problems and resolve them quickly. That’s the best way to ensure there’s no warped wood and the doors are suitable for use.
Additional work may also be required if you want to mould each panel, but this is dependent on the specific design you’ve chosen.
The Hardware
Hardware, such as the locking mechanisms, jamb, latch, door handle, and the hinge attachments, will need to be cut. Fortunately, this can be done with the router too, and can be fairly easy, if you measure out wisely. Line each attachment up and mark with a pencil so that you know where to drill or cut into. Specific measurements will vary depending on the attachment.
Additional Security Measures
Once you’ve made all the necessary measuring, sanding, and cutting, you need to ensure the doors are suitable so lift it up to the frame and establish if it’s suitable. If you’ve done your measurements right, it’ll be able to open and close freely in the entryway; if not, additional trimming may be required to get a perfect fit. If everything is well, you need to make the door secure. While you’ve dried assembled them, you could strengthen by bonding the pieces together with glue and dowels. This is a personal choice but glue probably is necessary, especially since this is an exterior door.
Hanging Your Handy Work
Once everything is good to go, you should attach the door to the frame and take it for a test run. While it should run smoothly, minor tweaking may be needed. This is to be expected since you’ve built it from scratch. More often than not, it needs to be planed or sanded down to offer a more effective fit.
Designing and building front timber door can be easier when you have the right tools and machinery at hand.
Creating Complex Mould Work with a Router
There are lots of ways to create tricky and complex mouldings, and you won’t need to buy expensive cutters or accessories. Your router should be sufficient enough to do the trick. However, you may need additional mould bits and sets to enable you to create complex designs. You’ll need to do the bulk of building the doors before attempting this part. It’ll also be far easier if you think about the type of moulding you want before you start.
Ideally, start with the rounded router bit so you create the appropriate grooves. It doesn’t matter if you’re building a table or several new cabinet doors, it’s easier to start with the rounded designs first. The depths of the grooves will vary depending on what you’re hoping to achieve. Next, use the radius bit to round all edges off and any excess stock can be removed with the bench saw. Once you’ve done that, you’ll need to attach the moulding of panels.
To do this, you’ll need to glue and pin the face panels in place. However, it takes time for the construction to be perfect. Designing and building front door is difficult enough without throwing complex mouldings into the mix, especially when you aren’t familiar with this practice. You may want to have a few test runs on an old wooden board and get used to the machinery also.
How to Build a Timber Door Frame from Scratch
Frames are an essential part of an entryway and must be built properly. Fortunately, with a few practice runs, it’ll be easy to achieve perfection. Of course, the best timber must be utilized to ensure the frames are strong enough to support doors and last a lifetime. So, how to build a frame?
- Measure Up
While there are lots of techniques to use, you want to opt for a simple construction method. It’ll be easier to work with; however, no matter which method you try, you have to start by measuring the size of the frame needed. This could be determined by the existing frame in place or how the doors open. Ideally, you want to a snug fit with no more than a 2mm gap from the frame to the brick or mason work. Any minor gap can be filled with sealant later.
- Cutting The Frame
You’ll need to cut the frame to size, but fortunately, it can be done with a router cutting tool. You may want to cut the frame slightly bigger so the fit is as firm and as secure as possible. It’ll give you a horn design and this will protect the frame during transportation. You might also need to add a threshold rail. If so, a bevel cut is required. This cut will go on the leading edge of the frame while the bottom or outside lip requires a groove dip.
- Jambs, Rebates, and Mortises
All tenon joints must be marked out for the jambs and the router can be used for the rebates. The thickness of these cuts will depend on the doors being installed, and the cuts will run the length of the backside of the frame. This part needs to be done carefully and a chisel might be required to offer a more precise finish, but again, this varies on the timber used. For mortises, you’ll need to drill and chisel these out.
Finishing the frame can be done by gluing the assembled frame parts together. Of course, with every construction method, the steps involved will vary.
Top Security Tips That Never Fails
Home security must be at the forefront of all property owners’ minds because it’ll make it tougher for anyone to compromise the safety of the home. Knowing a few security tips for your doorways and entry points might enable you to stay safer.
- Always Maintain Your Doors By Carrying Out A Routine Monthly Inspection
If your doorways are compromised, they’re not secure. It’s essential to routinely inspect the doors – including the framework – to ensure they’re in the best condition possible. Unfortunately, homeowners don’t consider this as they feel it’s unnecessary or forgets about it; but, intruders find a route in. It’s essential to look at maintaining the integrity of the home by keeping all doorways in the best shape possible. That may mean replacing broken or loose locks and bolts more often, but it can be well worth it if it means keeping your home safe.
- Heavy-Duty Dead Bolts and Locks
Deadbolts and deadlocks are versatile and very effective. They will certainly make it tougher for unwanted guests to enter your home and should be given a lot of consideration. Apartments and homes can benefit from such things and they’re not overly expensive either. Installation takes very little time and a quality deadbolt can give you a few more precious seconds when someone is trying to gain entry to your property.
- Security Bars and Jammers
Security jammers and bars are ideal for most homes. Of course, these vary considerably and it’s essential to find a suitable option for your home in particular. Fortunately, they can withstand a lot of force and they’ll certainly slow down most burglars or unwanted guests. Security bars or jammers sit between the door’s handle and the floor. Once they’re lodged properly, it’s a nightmare to break in; although, these alone mightn’t be enough to deter all burglars.
- Use Reinforced Locks
Your front doorway is just as much at risk as to the back, side, and garage doorways. Even if you have a strong wooden frame, there are no guarantees they’ll withstand a burglar. Reinforced locks are a lot more versatile and quite strong. They provide additional security for your home and can be a great deterrent for burglars and intruders.
- Quality Improve Security
Whether you build your own or otherwise, quality timber door improves your overall security. This means every doorway to your home must be quality built and sturdy. Home security also falls on the type of locks you buy. Poor quality locks might make it easier for someone to gain entry and that’s not going to keep you safe. What’s more, security isn’t limited to the front entrance; you also have to consider the others, including the windows. A home security system might be necessary to keep your home secure at all times.
- Keep your locks Locked
While most homeowners or renters don’t need to be told to lock up, still many aren’t. The trouble is that you always assume someone else will do it or that you’ve already done it. Instead of running the risk, conduct a lock check before you leave the home and when you’re heading off to bed. If you do this at least you know you didn’t make it any easier for the burglars to get into your home.
Of course, some security methods will work more effectively for some homes than in others. The truth is that every home needs different levels of security and protection. Sometimes, security will be determined by the type of property it is, how many entrance points there are, and the condition of the home. At other times, it’ll all come down to what a homeowner feels is absolutely necessary.
Become a Home DIY Expert
Building a solid timber door can be a wonderful experience and certainly something incredibly special. There aren’t many homeowners who can say they’ve built part of their home, even if it’s just their entranceway. DIY projects can be fun with a little know-how behind you. What’s more, they can add something more to your home and it’s easy to start with a doorway with a router machine. Check the bosch benchtop router table review, because buying the best can ensure your project goes smoothly.
Amazon and the Amazon logo are trademarks of Amazon.com, Inc, or its affiliates.